With this tutorial you will learn how to model a beam and set the deisgn of the concrete cross section subject to pressure bending. The beam is subject to two point loads placed at a unitary distance from the supports and a horizontal force, also unitary. The total length of the beam is 10m and the section is rectangular 30x70cm.

You want to create the following stress states on the central element: given the unit loads, you can do this by setting appropriate load combinations.
| CASE | A | B | C | D | E | F | ||
|---|---|---|---|---|---|---|---|---|
| Bending moment [kNm] | M | 500 | 1500 | 1000 | 1000 | 400 | 300 | |
| Axial force [kN] | N | 0 | 0 | 1000 | 1800 | 2000 | 2000 |
Below we guide you in the creation of the model. If you want, you can also find it among our tutorials in WeStatiX.
Step by step
GEOMETRY
Create the nodes!

Then create members

PropERTIES
Go to PROPERTIES and define the properties of the material by clicking on Materials and then New. Enter the parameters for concrete.

Then click New again and define the parameters for reinforcement steel.
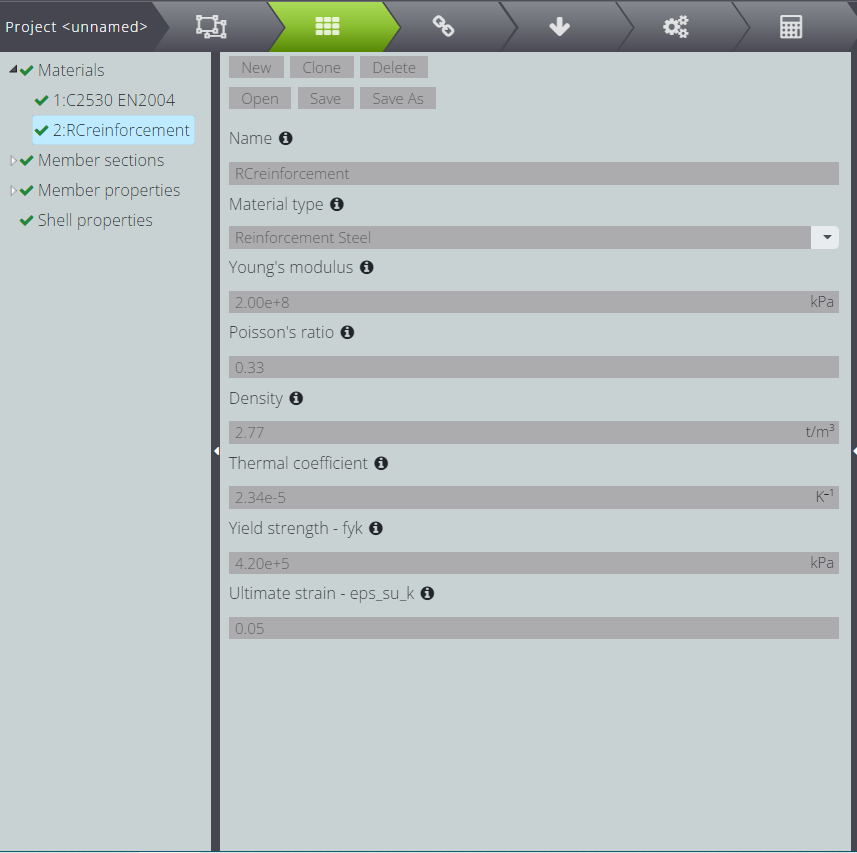
Now click on Member sections and create a rectangular section: just fill in the fields in Parametric as shown below.
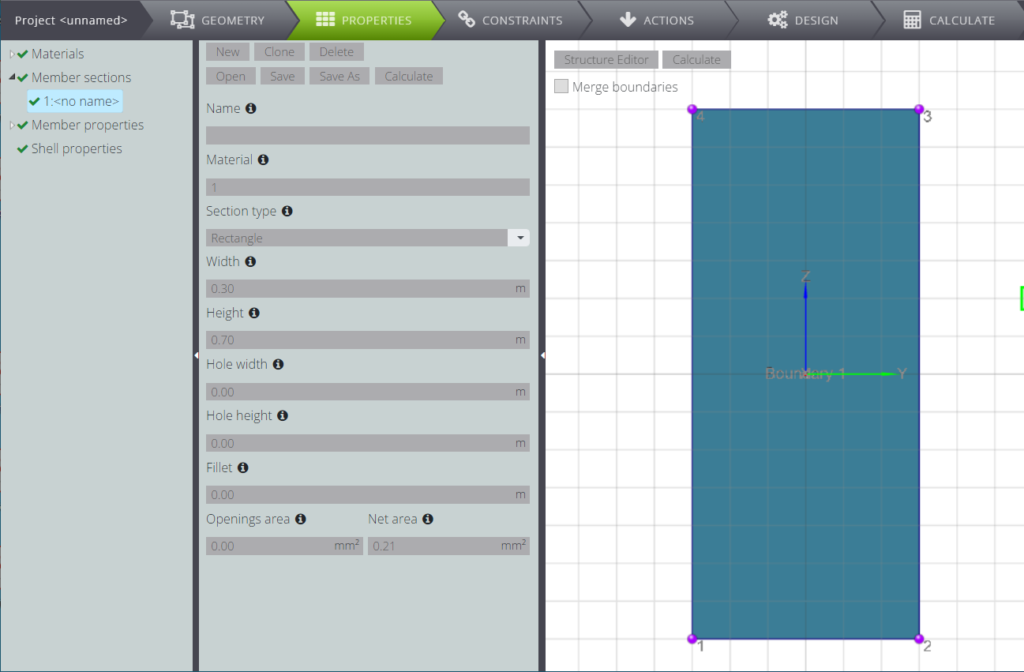
At this point you only have to attribute the material and the section to the elements you have created. Move to Member properties
- click on New
- fill in the Members field by writing the numbers from 1 to 3
- lastly, fill in Section

If you activate 3D visualization in the ToolBox, you will see that the section has been assigned to the three elements.
CONSTRAINTS
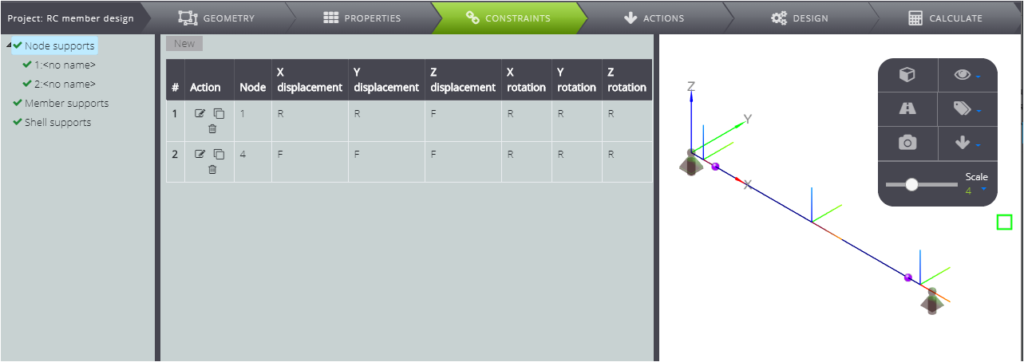
Now impose the constraints on the beam. Press CONSTRAINTS, node supports.
- Fix only the long Z displacement for node 1
- Fix all displacements for node 2
ACTIONS

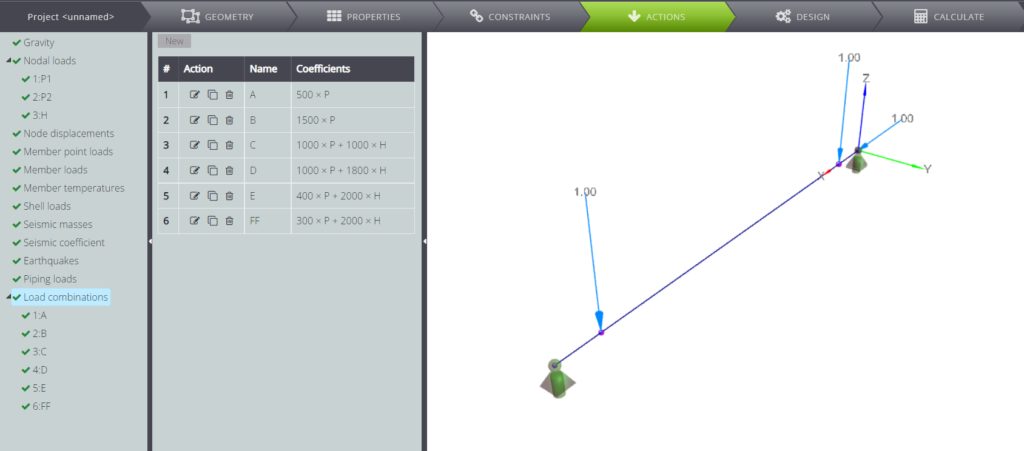
To define the forces, press ACTIONS and then Nodal Loads. Enter two unit value loads in Z direction in Nodes 2 and 3. Also enter the unit load in the direction parallel to the beam axis in Node 1.
To generate different stress states on the section creates different load combinations. Since the inserted loads are unit loads, the multiplicative coefficients you have to insert are the absolute value of the forces you want to apply.
In the image below you can see the summary of the load combinations that have been created.
PROJECT PARAMETERS
To enter the necessary parameters for the design of reinforced concrete sections, click on DESIGN, and then RC member design. Move to the Data Panel and press New, then fill in the fields as in the image below. This is how you specify:
- the element on which to perform the analysis;
- the load combination for which you want to perform the designing;
- the reference standard;
- the material to be used for the reinforcement;
- the distance of the center of gravity of the upper reinforcement from the upper edge of the section;
- the distance of the center of gravity of the lower reinforcement from the lower edge of the section.
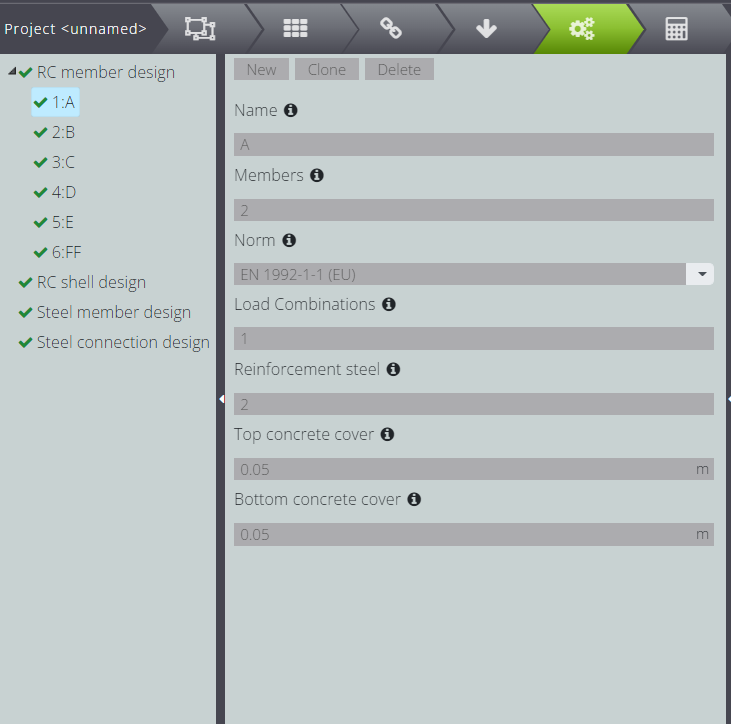
Now you just need to click on Clone and create as many design cases as previously defined load combinations. For each created case you just need to change the Load combinations field.
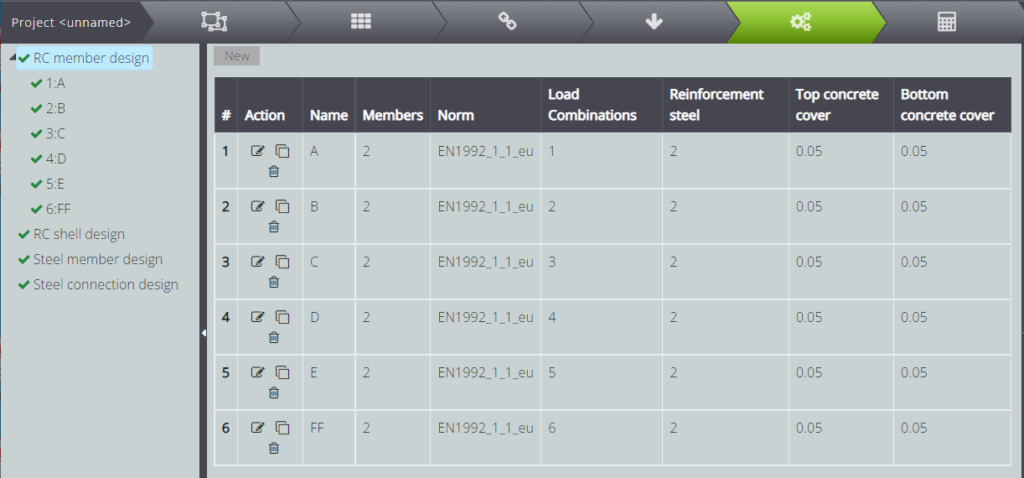
In the following image you can read the summary table of the designs that are performed.
RESULTS
After launching the analysis, you can see the results divided by the various load combinations and design cases you have set.
We have also used this example in our Validation Manual, where you can read more about the results.
